Incident reporting
Use Incident reporting to document safety-related events in the current project: hazards, incidents, near misses, environmental issues, and similar. Reports can include attachments, a comment and status history, and (for the project owner organization) report acceptance or rejection with comments.
Permissions
- To open the list and view reports, you need the
Viewpermission onProject Health and Safety → Incidents reporting. - To create or edit reports when the status allows it, you need the
Create/Editpermission on the same functionality. - To delete a report, you need the
Deletepermission on the same functionality, and the report must be created by your organization.
To check your exact permissions, use Where I can find my permissions in SUM-IT.
Opening Incident reporting
- Select the correct project on the Projects screen.
- Open the main menu and go to Health and Safety → Incident reporting.

The Incident reporting menu item is shown only when all of the following are true:
- HSE is available in the current project.
- Your user has at least one organization role assignment in the current project.
- Your permissions include View on Project Health and Safety → Incidents reporting.
If the item is missing, check these three conditions in the selected project.
Incident list
The table lists incidents for the project. Depending on your organization and the reporting hierarchy, you may see reports created by your organization as well as by other organizations if your organization is a project owner.
The table includes Rep. number, Event type, Incident date, Reported date, Reported by organization, Identified by, and Status.
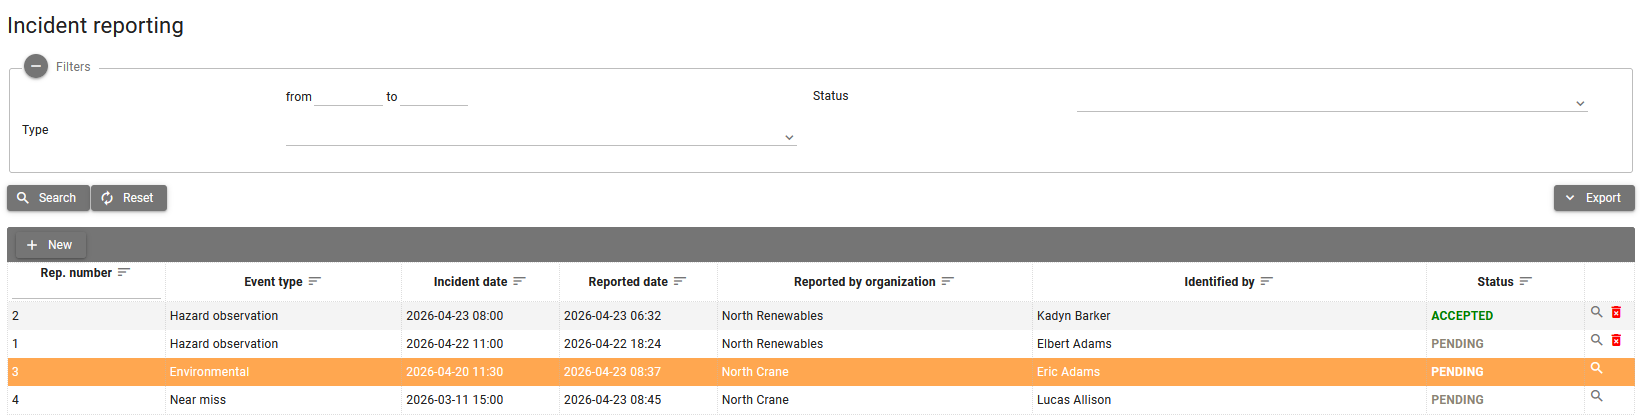
The filters are event date range, event type, and status. Use Search to apply them and Reset to clear them.
Export — Use the Export menu and choose Export to Excel if you need a spreadsheet copy of the list.
Actions (depending on permission and row):
- New — Opens the dialog to create a new report.
- View (magnifying glass) — Opens the report.
- Delete (trash) — Removes the report. Visible when your organization is the report creator and your permissions allow it.
Register / edit incident dialog
Open a new report by clicking New, or open an existing one with View.
The dialog has two tabs:
- Report — Main fields and status actions.
- Attachments — Files linked to the report.
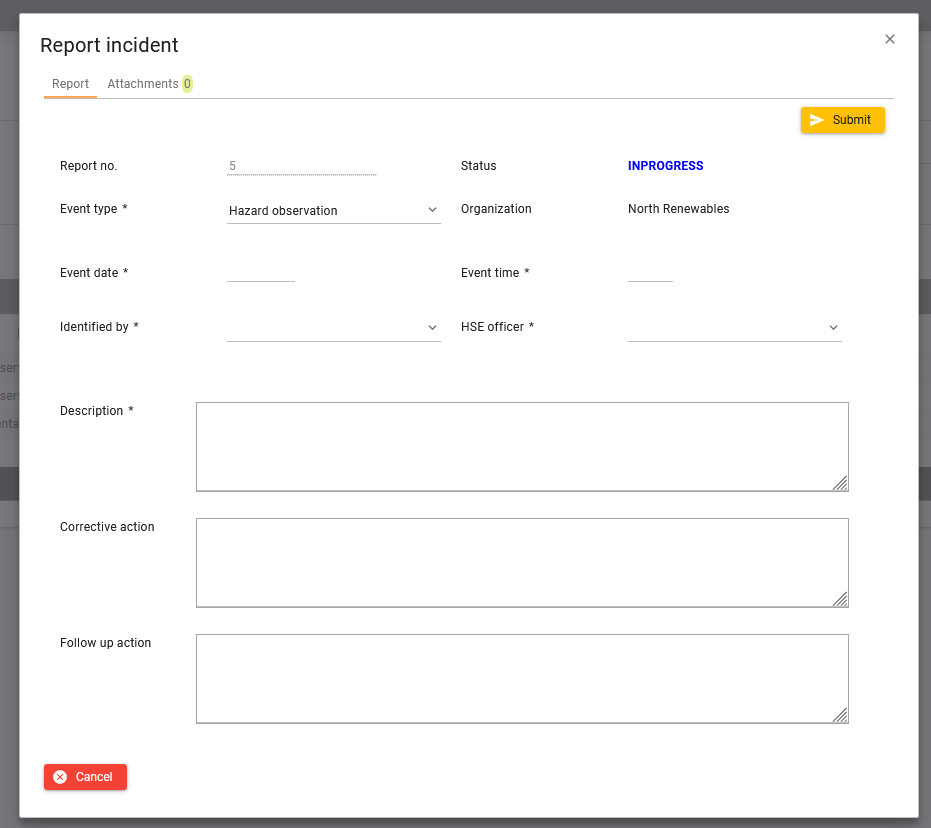
Report tab — main fields (labels match the application):
- Report no. — Assigned when the report is created.
- Status — A new report starts as In progress. Later it becomes Pending after Submit. Accept sets it to Accepted, Reject sets it to Rejected.
- Event type — One of: Hazard observation, Incident report, Near miss, Environmental (required).
- Organization — The organization that created the report (read-only).
- Reported date / Reported time — When the report was registered.
- Event date / Event time — When the event happened (must not be in the future; required).
- Identified by — Person who identified or reported the event (required).
- HSE officer — Person responsible for handling the case (required).
- Description — What happened (required).
- Corrective action — Actions taken or planned.
- Follow up action — Further follow-up.
Actions on the Report tab (visibility depends on status, organization, and permissions):
- Submit — Saves the report and sets the status to Pending. Shown when you have the Create/Edit permission and belong to the organization that created the report.
- Accept / Reject — For users from the project owner organization with the Create/Edit permission; opens the comment dialog, then sets the status to Accepted or Rejected together with your comment.
- Edit — Sets the status to In progress and enables editing when your organization created the report, you have the Create/Edit permission, and the project is not read-only.
- Close — Closes the dialog.
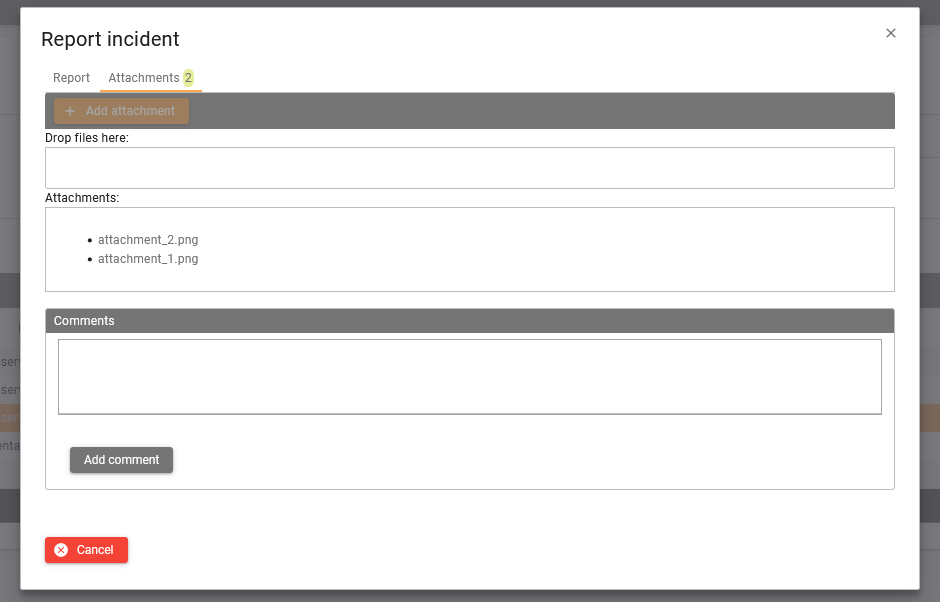
Attachments tab
Use the Attachments tab to keep files related to the incident in one place (for example photos, reports, or supporting documents).
What you can do on this tab:
- Upload — Add one or more files to the incident record.
- Download / View — Open or download existing files from the attachment list.
- Delete — Remove an attachment when your permissions and the incident status allow editing.
Attachments are saved as part of the same incident report, so everyone with access to that report can review the uploaded evidence.
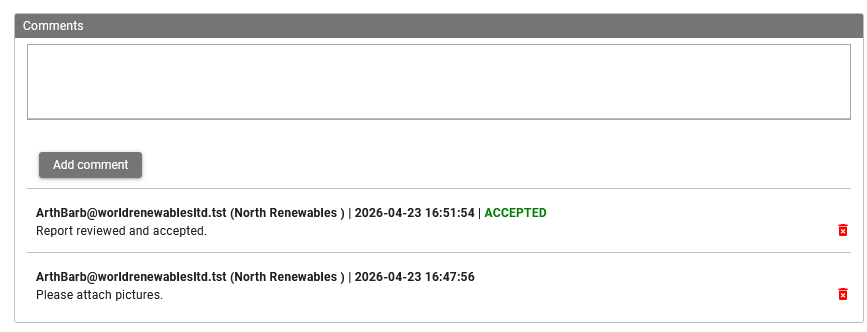
Comments and change log
The panel Comments and change log lists:
- Comments added using Add comment by organizations that can view the report.
- Entries created when the status changes, including changes made after selecting Accept or Reject and saving a comment in the comment dialog.
You can delete your own comment entries when the project is not read-only (project status is ACTIVE or SERVICE); status-change entries are kept as history.
See also
- Health and Safety (HSE) overview
- Certificate notifications — Separate alerts for certificate expiry (not incident-specific).