Project configuration
After creating the project and completing its structure, you can start configuring it on project configuration screen by adding persons, equipment, creating prices, estimates, deviations and give permission to review your reports. You can also start and stop the project on that screen. If you are subcontractor, you will be able to configure your part of the project.
To access the Project configuration screen, navigate to Projects
menu and click on the Project configuration button
![]() for the project you would like to
configure. The screen is accessible to any user who can see the project
on the Projects screen.
for the project you would like to
configure. The screen is accessible to any user who can see the project
on the Projects screen.

Steps to configure the project:
-
Join the project and add users to the project.
-
If required, change the permission to review and accept your daily reports by other organizations.
-
Define pricing levels. Later they will be used to create hourly based prices in the project.
-
Add persons roles to the project. Later you will be able to assign the roles when adding persons to project, also you can create hourly based prices against person roles.
-
Add persons to the project and assign them roles. Later you can register daily report activities against the persons.
-
Add equipment to the project and assign them roles. Later you can register daily report activities against the equipment, also you can create hourly based prices for the equipment.
-
Define hourly based and lump sum prices.
-
Define deviation numbers, to allow track the cost and time for stand by and extra work.
-
Add shifts, later you can select them when creating daily report.
-
Provide estimates to track you performance in the project.
Starting the project and project statuses
Users with Create/Edit permission on the
Projects functionality have the ability to start and
stop a project. Starting the project enables the creation of daily
reports, and billing for the project only occurs when the project status
is 'ACTIVE' or 'SERVICE'. As a project owner, you can start a
project in either the construction phase or a service phase. This choice
has no impact on running the project in SUM-IT; it only affects the
billing process for the project. Before starting the project, you will
be prompted to confirm your billing settings. For more details, please
refer to the Billing section.
Project statuses
Project can have one of the following statuses:
-
PENDING - means that project is newly created and no reporting started yet. If project was started but no daily reporting was done yet you can set status back to PENDING, to avoid unnecessary billing by clicking on Pause project button
 .
. -
ACTIVE - means that project is running and daily reports can be created. Project can be activated by clicking on the Start construction phase button. Subcontractor organizations can start the project only if project owner organization started the project.
-
SERVICE - means that project is running and daily reports can be created. That status is available only to project owner. Project can be activated by clicking on the Start service phase button.
-
CLOSED -- project closed is in read only mode i.e. project data can be reviewed but no new daily reports can be created. Project can be closed by clicking Close project button
 on ACTIVE project. Closed projects
can be started again any time, to continue reporting.
on ACTIVE project. Closed projects
can be started again any time, to continue reporting.
Project closes automatically if for number of days there is no reporting in the project. This is to avoid unnecessary billing. The number of days after which project will close is defined on System management -> System settings screen.
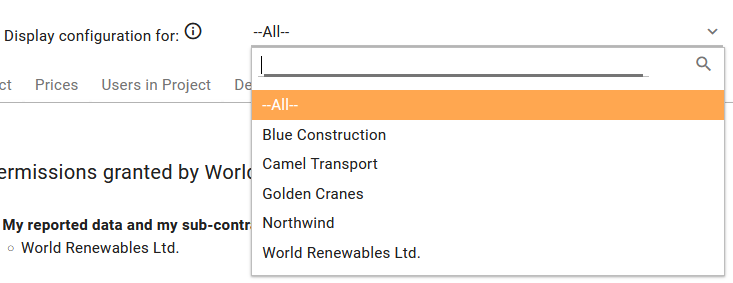
Filtering configuration tabs
Filter field named Display configuration for allows to select the organization in project for which you want to display the configuration on all of the Project configuration screen tabs.